MOD Info
Premium Unlocked
Polarr has multiple powerful and easy-to-use portrait adjustment tools, which cover adjustments to facial structure, facial features size, skin tone brightness, etc., which can help you finely sculpt every detail of your face. The filter function also has hundreds of carefully designed professional filters, which can help you create and share your custom filters. There are more than ten image blending modes to add rich special effects to your photos. In addition, the interface layout adopts a horizontal screen three-section design, with toolbars on the top and bottom and the main area for software operation in the middle. The right side of the interface is an area for some basic tools, and the left side is a variety of filters with different styles, and users can create custom filters. It can be said that basic image editing operations are all available.
How to use Polarr
1.Interface design
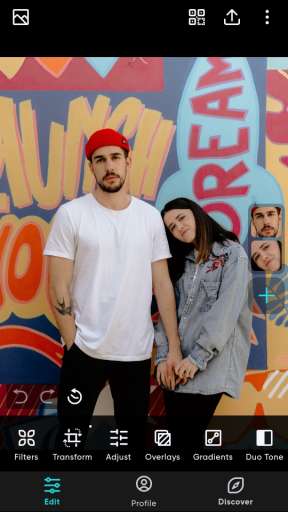
Polarr adopts a horizontal and vertical screen switching design. We can choose horizontal or vertical screen according to our own usage habits. When entering Polarr for the first time, the default is portrait mode:
At the same time, we can also adjust the position of the icon according to our own usage habits, and long press to drag the icon. In order to facilitate everyone's viewing, all the following guidance is conducted in landscape mode:
The icon in the upper left corner of Polarr is the import button, through which you can import and edit.
The icon in the lower left corner of Polarr is the settings button, through which you can log in to your Polarr account, modify the theme, switch languages, set the maximum output size and other functions.
The icon in the upper right corner of Polarr is the export button, through which you can set the export quality, export size and other options.
The icon in the lower right corner of Polarr is the app store button, through which you can purchase Polarr advanced features and unlock all filters.
When we click on the image, we can call the color histogram to view the exposure, color and other information of the icon. When we click on the image again, the histogram will be hidden (see dragging and hiding the histogram).
2. Import photos
When you first open Polarr, two options will appear on the home screen: Open Photos and Open Sample Photos. When you choose to open a photo, it will jump to the system folder; when you choose to open a sample photo, Polarr will automatically open the sample photo. When we choose to import a photo from the system folder, the photo will appear on Polarr's main interface.
3. Global adjustments
Polarr's global adjustments are adjustments performed for all areas, and the adjustment categories include color, light effects, texture, vignetting, HSL, curves, hue, distortion, and special effects. When we want to adjust a certain parameter, such as adjusting the color temperature to +100, we can use the color block sliding or the progress bar adjustment. The former only requires us to put our finger on the color block and then slide left or right; the latter only requires We need to click on the color block and then slide the progress bar up and down.
Color: The adjustment tools under the color category are mainly used to adjust the color of the picture. Including four adjustment options: color temperature, hue, natural saturation and saturation.
Light Effect: The adjustment tools under the light effect category are mainly used to adjust the exposure of the picture. Including eight adjustment options: Dehaze, Exposure, Brightness, Contrast, Highlights, Shadows, White Level, and Black Level.
Texture: The adjustment tools under the texture category are mainly used to adjust the texture of the picture, including four adjustment options: clarity, sharpening, color noise reduction and brightness noise reduction.
Vignetting: The adjustment tools under the Vignetting category are mainly used to add vignetting or bright corners to the picture, including five adjustment options: degree, feathering, highlight, size, and roundness.
HSL: The HSL tool is mainly used to adjust the hue, saturation and brightness of a color. The HSL tool in Polarr provides a total of eight colors for us to choose from: red, orange, yellow, green, magenta, purple and blue. . blue.
Curve: The curve tool can be used to adjust the exposure of the picture and the color of the picture. The curve tool includes a total of four curves: RGB curve. Red curve. Green curve. Blue curve. Use the RGB curve to adjust the exposure of the picture; use the next three curves to adjust the color of the picture.
Posterization: The Posterization tool can add a specified color to the shadows or highlights in the picture.
Distortion: The adjustment tools under the distortion category are mainly used to correct the distortion of the picture or create visual special effects, including three adjustment options: lens distortion, horizontal perspective, and vertical perspective.
Special effects: The adjustment tools under the special effects category are mainly used to add special effects to the picture, including five adjustment options: color difference, pixelation, glare, noise level, and noise size.
Copy adjustments: Click "Copy Adjustments" to copy the current adjustments. We only need to open another one, and then click "Paste Adjustments" to apply all current adjustments to another one.
Reset: Click the "Reset" option to reset all current adjustments and restore them to their original state.
Guide: Click the "Guide" option, and the software will introduce the use and adjustment functions of the adjustment tools on the screen one by one, helping us master the software faster.
4.Guide tutorial
Under the guidance tutorial panel, it includes Polar Encyclopedia. Learn to defog. Learn white balance. Learn distortion. Learn exposure. Learn global adjustment. Learn circular adjustment. Learn gradient adjustment. Learn color selection adjustment. Learn brushes. Get started. .Twelve options for keyboard shortcuts.
Polar Encyclopedia: Polar Encyclopedia is a post-learning website. Click this option to jump to the Polar Encyclopedia website.
Learn to defog: When you click this option, you can learn how to clear the screen through an interactive tutorial.
Learn white balance: When you click this option, you can learn how to correct the white balance of the picture through an interactive tutorial.
Learn Distortion: When you click this option, you can learn how to correct the distortion of the picture through an interactive tutorial demonstration.
Learn global adjustment: When you click this option, you can learn the meaning and use of each parameter under global adjustment through interactive tutorial demonstrations.
Learn circular adjustment: When you click this option, you can learn the basic usage and scope of circular adjustment through interactive tutorial demonstrations.
Learn Gradient Adjustment: When you click this option, you can learn the basic usage and scope of gradient adjustment through interactive tutorial demonstrations.
Learn color selection adjustment: When you click this option, you can learn the basic usage and scope of application of color selection adjustment through interactive tutorial demonstrations.
Learn brushes: When you click this option, you can learn the basic usage and scope of application of brush tools through interactive tutorial demonstrations.
Get started: After clicking this option, you can learn the basics of using Polarr through interactive tutorial demonstrations, such as how to use filters, how to adjust parameters, etc.
Portrait: After clicking this option, you can learn the basic use of the portrait panel through an interactive tutorial demonstration.
5. Local adjustments
Using Polarr's local adjustment tools, we can use different adjustment methods for different areas of the picture to achieve more precise adjustments. Local adjustments in Polarr include color selection adjustment, brush adjustment, circular adjustment, and gradient adjustment. We can apply multiple local adjustments at the same time.
5.1 Color selection adjustment
Use the color selection tool to make adjustments to areas of the image that have similar colors. After creating a new color selection, a circle will appear in the screen. When moving the circle, some red areas will appear in the screen. These red areas represent the selected areas. The color selection tool will automatically identify the color comparison in the screen. Similar areas, our adjustments will only be applied to these areas. We can also control the size of these areas by adjusting the range. In order to adjust the picture more finely, you can also create a new radius, which can draw a boundary for the color selection tool. When the radius value is used, the main control point area of the color selection tool becomes an area within the large circle outside that has a similar color to the center sampling point.
5.2 Brush adjustment
Using the brush function, you can manually draw adjustment areas, and all adjustments will only affect these areas. When the brush tool is selected, you can use your finger to draw an area. During the drawing process, a red area will appear. These areas represent the selected area.
5.3 Circular adjustment
Using circular adjustments, we can selectively adjust parts of the image to achieve more precise adjustments. When we create a new circular adjustment, a circle will appear on the screen. The part outside the circle means that it is affected by our adjustment parameters, and the part inside the circle means that it is not affected by our adjustment parameters.
5.4 Gradient adjustment
Using gradient adjustment, we can selectively adjust parts of the image to achieve more precise adjustments. When we create a new gradient adjustment, three straight lines will appear in the screen. The part above the top line indicates that it is completely affected by our adjustment, and the part between the top line and the bottom line is gradually weakened. , the part below the bottom line means that it is not affected at all.
6. Cropping function
Using the cropping function, we can cut, rotate and flip the screen content. There are five tools under the cropping panel: Proportion. Rotate. Flip X. Flip Y. Reset.
Ratio: Crop the picture according to the ratio. Polarr provides a total of 12 sets of adjustment ratios including 1:1.1:2, etc.
Rotate: Rotate the screen 90°. Every time you click "Rotate", the screen will rotate 90° counterclockwise.
Flip X: Flip the image horizontally to turn it into a horizontal mirror image.
Turn Y: Flip the picture vertically, which can turn the picture into its vertical mirror effect.
Reset: Resets all cropping adjustments. If a cropping operation was performed before, clicking this option will restore the image to its original angle and proportion.
7.Portrait function
Using the portrait function, you can beautify and optimize people's faces. Polarr's portrait function is based on artificial intelligence technology, which automatically recognizes the face in the picture and automatically locates the facial features. We only need to directly adjust the corresponding options to realize the face. adjustment.
Under the Polarr portrait panel, there are four categories: intelligent recognition, face addition, point removal, and liquefaction.
Intelligent recognition: Using this option, you can adjust the faces of people automatically recognized by the software, which include six subcategories: skin, face, eyes, nose, mouth, and teeth.
Skin: There are six adjustment tools under the "Skin" category: Smooth, Gloss, Shadow, Highlight, Hue and Saturation.
Skin Smoothing: Skin Smoothing: Increasing the value can achieve a dermabrasion effect, making the skin smoother and more delicate, while decreasing the value can enhance the skin texture.
Skin gloss: Increasing the value can add light to the face, making the face look whiter and brighter. Decreasing the value can reduce the brightness of the face.
Skin shadow: Control the brightness of darker areas of the face. Generally speaking, you need to reduce the value of skin shadow and increase the value of skin highlight to make the face more three-dimensional.
Skin Highlight: Control the brightness of the brighter areas of the face. Generally speaking, you need to reduce the value of skin shadow and increase the value of skin highlight to make the face more three-dimensional.
Skin hue: Change the color of the skin, such as changing the skin from reddish to yellowish.
Skin saturation: Controls the brightness of facial skin. If your face feels too red, you can lower this option; if your facial skin feels dull, you can increase this option.
Face: There are three adjustment tools under the "Face" category: face width, chin height, and forehead height.
Facial Width: Make the face larger or smaller.
Chin height: Control the length of your chin to make your face longer or shorter.
Forehead height: Control the height of the forehead.
Eyes: There are four adjustment tools under the "Eyes" category: eye size. Brightness. Contrast. Emotion.
Eye size: Make eyes larger or smaller.
Eye brightness: It can enhance the brightness of the eyes and make the eyes look brighter.
Eye contrast: You can control the contrast of the eyes to make the texture of the eyes more intense.
Eye Clarity: Control the clarity of your eyes.
Nose: There are two adjustment tools under the "Nose" category: nose width and nose height.
Nose Width: Controls the width of the nose.
Nose Height: Controls the length of the nose.
Mouth: There are five adjustment tools under the "Mouth" category: Smile. Mouth Height. Mouth Width. Brightness. Saturation.
Smile: Control the expression of your mouth.
Mouth Height: Controls the vertical size of the mouth.
Mouth Width: Controls the horizontal size of the mouth.
Lip Brightness: Control the brightness of your lips.
Lip saturation: Controls the brightness of the lip color. Increasing the value can make the lips look more red.
Teeth: There are two adjustment tools under the "Teeth" category: Whitening and Brightness.
Teeth Whitening: Whiten facial teeth.
Teeth Brightness: Enhance the brightness of teeth.
Add a face: If there are faces in the picture that are not automatically recognized, we can also add faces manually. When we click the "Add Face" option, a box will appear on the screen. We only need to move the box to the person's face.
Spot removal: Use this tool to repair some facial blemishes that automatic dermabrasion cannot.
When a new point is removed, two circles will appear in the picture. The one with a solid circle is the "source area", and the one without a solid circle is the "target area". The defect repair tool uses the "source area" ” to repair “Target Area”.
In the defect repair tool, there are two modes, one is healing and the other is cloning.
In healing mode, Polarr will only apply the texture of the "source area" to the "target area". It will not affect the brightness of the "target area", so there is a better light and shadow match. In clone mode, Polarr copies the entire "source area" to the "target area" intact. Its coverage effect is better, but sometimes light and shadow mismatches are prone to occur. We need to choose these two modes according to the actual situation.
Liquify: We can manually adjust the shape of the picture using the "Liquify" option. The "Liquify" option is divided into four tools: the push tool, the smaller tool, the magnification tool, and the recovery tool.
Push tool: Using the push tool, we can change the shape and proportion of the picture. When pushing to the right, the entire picture will move to the right. Similarly, when pushing to the left, the whole picture will move to the left.
Smaller tool: Using the smaller tool, we can create an inward concave effect on the part, which can be used to shrink the face, etc.
Magnification Tool: Using the Magnification Tool we can make the image expand outward. We can use it to enlarge the eyes, etc.
Restoration tool: If we are not satisfied with the adjustment effect, or want to weaken the intensity of the adjustment, we can use the restoration tool to smudge the screen, and the smeared area will return to its original form.
8.Text function
Using the text function we can add text to photos. This function includes a total of four adjustment options: add text, shape, line, and preset.
8.1 Add text
There are 12 adjustment options under the "Add Text" option. Select font, alignment, size, line spacing, letter spacing, angle, color, opacity, blend, stroke, deselect, delete and copy respectively.
Font selection: Select the font of the currently edited text.
Alignment: Select text alignment, including left alignment, center alignment, right alignment and center alignment.
Size: Adjust the size of the text.
Line Spacing: Adjust the spacing between lines.
Letter Spacing: Adjust the spacing between text.
Angle: Adjust the rotation angle of the text.
Color: Adjust the color of the text.
Opacity: Adjust the opacity of the text. When the opacity is 100, the text is completely opaque; the lower the opacity, the stronger the blending of the text with the original image.
Blending: But when adjusting the "Blending" value, you can switch the blending mode of text and text. For example, when the "Blending" value is 50, it is a blending mode, and when the "Blending" value is 70, it is a blending mode. Different The blending effect of text and text in blending mode is also different.
Stroke: Add a stroke effect to text.
Inverse Selection: When the "Inverse Selection" option is checked, the text and the picture will form a cutout effect, and only the picture covered by the text will be retained, which is suitable for creating some visual special effects.
Delete: Click "Delete"
After selecting "Delete" option, the current text will be deleted.
Copy: After clicking the "Copy" option, the current text will be copied.
8.2 Shape
You can use the "Shape" option to add some geometric figures to the picture to enrich the shape of the picture. Polarr provides basic shapes such as squares, trapezoids, triangles, etc. for us to choose from. When we select a shape, the following adjustment tools will appear: Size. Angle .Color.Opacity.Blend.Stroke.Invert.Delete.Copy. The picture effects and adjustment methods of these parameters are consistent with the text and will not be described again here.
8.3 Lines
Using the "Line" option we can add some lines to the picture. Polarr provides some basic lines for us to choose from. When we select a graphic, the following adjustment tools will appear: Size. Angle. Color. Opacity. Blending. Stroke. Invert.Delete.Copy. The picture effects and adjustment methods of these parameters are consistent with the text and will not be described again here.
8.4 Default
Using the "Preset" option we can quickly add existing text templates to the screen, and we can edit them again based on these existing templates.
9. Filter
Using the "Filter" function, we can select existing image adjustment presets to quickly beautify our photos. When we click on a filter, we can apply the filter. The vertical bar on the right can adjust the filter strength. The default is 100.
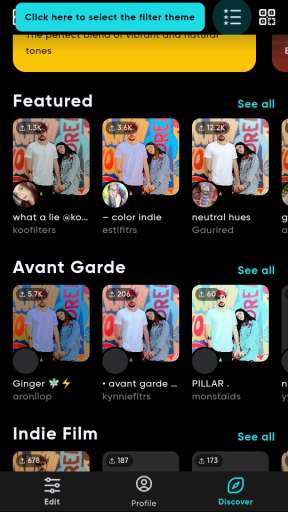
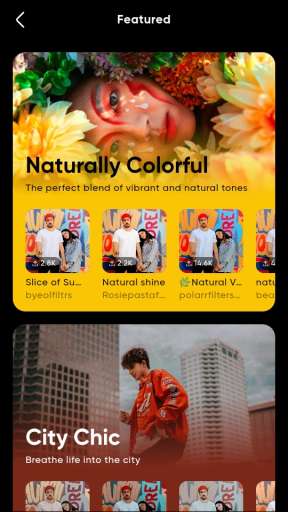
Polarr provides multiple sets of filter presets, including multiple sets of film presets such as modern photography, art film, and negative film, as well as multiple sets of non-film presets such as dynamic details, seasons, and Japanese.
9.1 Get filters
We can import and install filters using Polarr’s “Get Filter” feature. First click the filter icon, then click More on the left. A filter panel will pop up. Select Get Filter in the upper right corner: Two options will appear at this time, one is to scan the filter, and the other is to scan the filter from the photo. Import. After choosing to scan the filter, the software will call the system camera. We only need to point the camera at the QR code with the spicy filter information to install the filter; when choosing to import from photos, the software will enter In the system album, we need to select the QR code with Polarr filter information to install the filter. When installing the filter, a normal network connection is required, otherwise the installation will fail.
9.2 Custom filters
In Polarr, if we adjust a filter effect that we like very much, we can save it by creating a new filter and apply it to other photos. First click the filter icon, then click More on the left to expand the filter panel, and then click New Filter: A panel will pop up, which includes two columns: editing and annotation.
Edit the following options to:
Major adjustments: When this option is checked, all major adjustments (such as color, lighting effects, texture) will be saved.
Selective adjustments: When this option is checked, all selective adjustments (including linear adjustments, circular adjustments, color selection adjustments and brush adjustments) will be saved.
Text: When this option is checked, all text information will be retained.
Cropping: When this option is checked, all cropping information will be retained.
Note that the following options do:
Filter introduction: A general introduction to this filter, so that others can understand the relevant background information when installing your filter.
Reorder: Reorder the adjustment steps so that others can better understand the adjustment ideas of this filter. When you click Reorder, the order of all steps can be adjusted one by one. For example, below we can move "Saturation" to the first step. After the adjustment is completed, we click Save to save the sorting.
9.3 More filters
Through this option we can get more filters, which we can purchase and install according to our needs.
9.4 Switch filter groups
We can switch filter groups through More on the left side of the filter panel, or we can switch filter groups by sliding the filter up and down with our finger. Different filter sets have different design styles and color tendencies, and we can choose according to our own needs.
9.5 Collection filters
If we particularly like a filter in Polarr, we can long press the filter and then click "Add to Favorites" so that the filter will be classified into favorites. When we click More on the left side of the filter, and then select "Favorites" in the pop-up filter panel, we can quickly find the filter we just collected in the favorites.
9.6 Filter learning
Long pressing the filter can trigger the filter learning function to help us understand the color adjustment ideas of the filter.
9.7 Filter re-editing
Polarr's filter mode is different from other photo retouching software. The filter parameters of mainstream photo retouching software are all encapsulated. When we apply a filter, we don't know what parameters the filter has adjusted. At the same time, it can only be based on the filter. Effects perform entirely new adjustments without directly modifying the filter itself.
But when we apply a certain filter in Polarr, we can see all the adjustment parameters of this filter, and can also edit it again based on these adjustment parameters, which is more flexible and controllable.
10.History
Using Polarr's history recording function, we can quickly return to any step of the historical operation. All our operation steps will be recorded in the history panel. When we click on any historical operation, the image will be restored to the state of this step.
Through "History", we can bring up two options: "Restore to original" and "Clear history".
Revert to original: After clicking this option, the image will be restored to its original editing state, but the original history will not be lost.
Clear history: After clicking this option, the image will be restored to its original editing state and all history records will be cleared.
11.Cancellation
Through the undo function, we can restore our operations to the state of the previous step until we return to the starting point of the history.
12. Export photos
Through the export photo function, we can set settings for the exported photos, including two major items: watermark.
12.1
Through options we can set the quality and adjustments of the export.
Quality: Polarr supports setting the quality to four levels: low, medium, high, and best when exporting. The higher the output quality, the higher the overall quality of the image (sharpness, color, details, etc.) will be, but the volume will also be larger. big.
We can also manually set the quality value ourselves, for example, set the quality value to 75.
Adjustment: We can use the adjustment option to change the size. Polarr provides three modes for us to choose from, namely Adjust, Fit and Crop.
Adjustment: Adjustment is direct adjustment without saving the ratio.
Fit: Adapt will maintain the proportions of the image, and then use the shortest side to scale the image proportionally.
Cropping: If the length and width values we export are smaller than the length and width values of the original image, the original image will be cropped.
12.2 Watermark
Using the watermark function we can add watermarks to our photos.
Use watermark: When the "Use watermark" option is turned on, the watermark function is turned on. At this time, we can choose the system default watermark or external watermark and add it to the photo.
Edit watermark: After clicking the "Edit Watermark" option, four adjustment options will appear: Selection.Opacity.Size.Angle.
Choice: Using this option we can import from outside as a watermark, the format can be JPEG or PNG.
Opacity: Adjust the opacity of the watermark. When the opacity is 100, the watermark is completely opaque (if the watermark itself does not contain transparent information); the lower the opacity, the stronger the integration of the text with the original image.
Size: Adjust the size of the watermark. The larger the value, the larger the screen space the watermark will occupy; the smaller the value, the smaller the screen space the watermark will occupy.
Angle: Adjust the angle of the watermark. Increasing the value will cause the watermark to rotate counter-clockwise. Lowering the value will cause the watermark to rotate clockwise.
Similar Apps
